4.9+ Rating

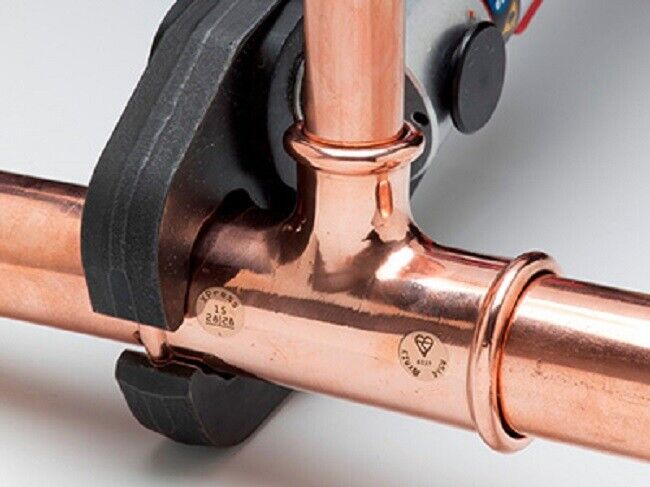
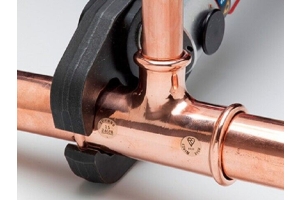
When using press fittings on an installation, first prepare the pipe by cutting it to length using a pipe cutter. Then continue by deburring the pipe and cleaning its surface. Many installers choose to insert the pipe into the fitting prior to pressing and marking the pipe to indicate where the pipe has been fully inserted into the fitting. Then, when ready to press, insert the pipe fully to the marked depth.
Next, use the correct size pressing jaws for the fitting. Most press tools come with 15mm, 22mm and 28mm jaws as standard. Ensure the jaws are square on the fitting. Finally, complete the press cycle by pressing the trigger on the press tool and holding it in place until you hear a pop. This will indicate that the fitting has been pressed and sealed. Make sure to mark each fitting after installation and test the system for leaks to ensure a secure and leak-free connection. Many press fittings now come with a ring of plastic around each end of the fitting that breaks and comes loose to indicate when each end of the fitting has been pressed.
It is important to maintain your press tool and ensure that it is regularly serviced. Tools such as our M-Profile Press Tool (MP1528) is capable of completing 10,000 press cycles between services and has an integrated OLED display to monitor cycle count. The tool also has a 350 degree rotating head to help press in tight spaces where fittings may be awkward to get to.
What is impressive is the speed at which installations can take place compared to traditional soldering methods. The M-Press Tool can complete a cycle in 2.4 seconds. The kit comes with 15mm, 22mm and 28mm jaws and is also compatible with leading brands such as Novopress and Rothenberger.