4.9+ Rating


In every home there comes a time to revive the walls with a fresh lick of paint or unravel a new roll of wallpaper. It’s easy to get swept away in the excitement of swatches and colour charts, before eventually arriving at the afterthought of - ‘wait, how do we tackle behind the radiator?’
We’ve composed a guide of nifty hacks, tips and tricks so that there’s no need to contort yourself into strange positions and awkward manoeuvres to work around it. In around 30 minutes you can have your radiator removed from the wall so you can get cracking on with the fun stuff!
Tool Kit Checklist
Picture this - you’ve got the weight of your radiator resting on your shoulder and you can't put your hand on the tool you need. Save the scrambling about and extra stress by giving this checklist a quick look over and keeping your tools laid out or in reaching distance.
- Radiator Key
- Adjustable Spanner
- Towels and a Sponge
- Shallow Tray (a paint roller tray or old plastic carton are ideal for sliding under the radiator, but are still able to hold a good amount of water)
- Bucket or Washing-up Bowl
- Dust Sheet
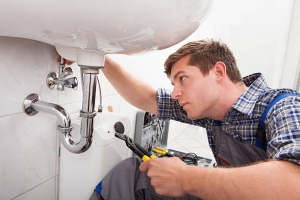
Assistance is recommended for safety reasons as there is awkward, heavy lifting involved, along with chances of spillage and scolding.
Preparation
Turn off Central Heating
Scolding yourself with escaping boiling water is something you could do without. Turn off the central heating in your home and allow for the system to fully cool before attempting to remove the radiator. Turning your heating off can be made easy with the use of Smart Technology Controls. Thermostats are a particularly handy invention because they allow you to control and monitor the climate of your home with a touch of a button. Smart Thermostats provide even further benefits since they can be linked to the phone, giving users control over their heating system wherever they are. Perhaps whilst you’re out buying decorating supplies, turn your heating off via your Thermostat so that by the time you return home you can get straight on with the radiator removal process.
Clear a Space for Radiator
Clear a space for your removed radiator unit to rest whilst you’re decorating. This could be in another room, or simply propped against a wall.
Tip: Lay down some towels under the removed radiator to catch any residual drips that could escape - be sure to keep the radiator away from potential paint-splash zones when decorating begins.
Note the Pressure Level
Seek out the dial on your boiler and make a note or snap a photo of the exact reading, this way you have a clear record of where the pressure should be for future reference.
Remove Radiator Shelf?
They’re great for decorative purposes, but when it comes to removing the radiator underneath they can become the prime offender for bumped heads. Consider if you should remove the shelf before grappling with the radiator itself.
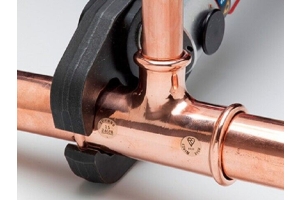
Step 1: Close Radiator Valves
Pretty simple, but an important step nevertheless. Closing the valves isolates the unit from the water supply.
There’s a valve located at each end of the radiator. One is likely to be the lockshield and the other the Thermostatic Regulator Valve (TRV).
TRV’s are self-regulating valves that sense the room’s temperature and adjust the flow of hot water to the radiator until the desired temperature is reached. It’s a great bit of equipment for both money and energy-saving purposes and can be found amongst our collection of radiator valves.
Use your adjustable spanner to turn the TRV to the zero or off position before removing the radiator, as the drop of temperature could trigger the valve to open and cause a flood.
Remember to also close the valve on the other side.
Tip: As you turn each valve, count how many turns it takes to close. This will make life easier when you come to reconnect them - simply make the same amount of turns in the opposite direction.
Step 2: Bleed or Drain Radiator
Now that the unit is isolated from the water supply, you can go ahead and bleed the radiator to take all of the remaining water out.
As careful as you may be, make sure to lay down a dust sheet and/or a towel to protect your floor surfaces from water damage. Place the shallow tray underneath the valves in preparation for catching the water.
Once fully prepared, use the adjustable spanner to grip the valve and slacken the nut.
Then loosen the bleed valve with the radiator key, at first a bit of air will release then water will soon start to leak out.
Keep the bucket or bowl nearby to empty the shallow tray into to avoid overspill.
Step 3: Remove Radiator
Now it’s time to remove the unit. With an up and away motion, carefully guide the radiator away from the wall brackets. Assistance may be needed as it can be a handful for one person to undertake.
Keep the radiator level or gently tip it to one side to get those last few stubborn drops into the tray or bucket.
Tip: Don’t be alarmed if you find unpleasant, black sludge emerging from the valve. It’s common for the last drops of water to look like this. Use the sponge to catch any pesky drips to prevent mess, especially if you’re transporting the unit across the house.
Step 4: Decorate!
This bit is completely up to you, now all obstacles are out of your way you can finally get cracking with paint or paper to bring your home decor vision to life.
Tip: Perhaps use this time to spruce up the radiator itself. Dust it down and when the unit is completely cold and dry, apply a specialist radiator paint which will resist discolouration when heated.
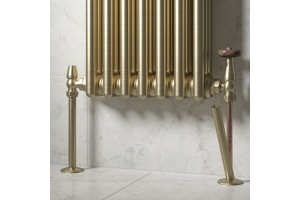
If you’re seeking a complete radiator revival, this is the perfect opportunity to install a new unit. Round Top radiators are a popular model due to their safety-conscious design composed of smooth curves.
Step 5: Rehanging Radiator After Decorating
To get the radiator back up and running, simply reverse the process.
- Hang the radiator back on the brackets
- Tighten the nuts to reconnect the valves to the water system
- Use the radiator key to close the bleed valve
- Now the valves are secured, the TRV can be restored to its original position
- Turn the other valve to open it, allowing water to flow and the radiator to fill up
- If you encounter trapped air, use the radiator key to open the bleed valve and release
- Repressurise your boiler, refer back to the original reading that you made note of earlier and close the valves
Now you can dust off your hands, step back and admire your handy work. Home pride has a whole new meaning when you’ve done the work yourself!
Find more products that work for your home and lifestyle by browsing MonsterPlumb’s entire convector radiators collection.